You Tested at 7 a.m. and the Tube Turned Green
The tank has been running for eight months. Nobody touched the filter, nobody bought new fish, and yet the ammonia tube in your liquid test kit just flashed green instead of yellow. That single color change is the one reading in fishkeeping we treat as a stop-everything event, because established tanks almost never show ammonia and the ones that do are already damaging fish gills. The good news: a spike caught within a day is very survivable, and the response is mostly mechanical. This is the plan we run in that first 48 hours, in order, with the numbers that matter.
Why Ammonia Is the One Reading That Cannot Wait Until the Weekend
Ammonia exists in water in two forms: ammonium (NH4), which fish tolerate, and un-ionized ammonia (NH3), which passes straight through gill tissue. The split between them depends on pH and temperature. At pH 7.0 and 78F, only a small fraction is the toxic form. Push pH to 8.0 and that fraction multiplies several times over. This is why one owner shrugs at a 0.25 ppm reading while another loses fish at the same number: the second tank probably runs harder water.
The damage mechanism is physical, not subtle. Ammonia burns gill filaments, thickens gill epithelium, and makes osmoregulation harder, so affected fish breathe fast, clamp fins, and stop eating even when the water looks clear. According to the AVMA, poor water quality and sudden deterioration of water parameters are among the most common preventable causes of illness in ornamental fish kept in home aquariums. An ammonia spike is exactly that category: invisible, fast, and entirely fixable with a bucket and a siphon.
There is a second clock running underneath the first. Your biofilter consumes oxygen while it processes ammonia, so a spike both poisons fish and quietly drains dissolved oxygen from the same water. Any serious response plan has to address both, which is why the steps below include an aeration check, not just water changes.
Step 1: Confirm the Reading Before You Dump Anything
Test kits give false alarms more often than people expect, and the fix costs thirty seconds. Re-run the test using a clean tube, fill to the line with tank water, and follow the bottle timing exactly. Two handling details matter more than the brand: shake bottle 1 vigorously before each drop, because the reagent settles, and hold the timer honestly for the full five minutes. A rushed reading at two minutes under-reports; a kit past its shelf life over-reports.
Then test your tap water in a second tube. If the tap itself reads ammonia, you have found a likely root cause in five minutes: many municipal supplies treat with chloramine, and standard dechlorinators break chloramine into chlorine plus ammonia, releasing a small dose into every water change. That pattern produces chronic 0.25 ppm readings that never fully clear. The response changes based on this answer, so do not skip the tap tube.
Record the number and the time. A 0.25 ppm reading that appears suddenly in a mature tank gets a different response than the same number that has been creeping up for a week, and your notes are the only way to tell those apart.
Step 2: Stop Feeding Immediately
Fish can go 48 hours, even a week, without food and suffer no harm. Detritus from uneaten food, on the other hand, is a direct ammonia source, and every feeding during a spike adds fuel. So the instruction is blunt: no food for the first 24 to 48 hours, depending on how long the reading takes to fall. Bottom feeders and shrimp will find plenty in the substrate. A tank full of hungry faces is not an emergency; a tank full of burned gills is.
Step 3: Cut the Ammonia With a Sized Water Change
Water changes are the fastest and safest ammonia remover available, and the size of the change should match the reading rather than follow a fixed routine:
- 0.25 ppm: a 25 percent change, then retest.
- 0.50 to 1.0 ppm: a 50 percent change, dechlorinated and temperature-matched, then retest the same day.
- Above 1.0 ppm, or any reading with fish showing symptoms: 50 percent now and another 50 percent a few hours later, repeating until the number drops near zero.
Match temperature within a couple of degrees and treat the full tank volume with dechlorinator, not just the water you removed. Siphon from open water rather than digging into the substrate bed; the gravel holds a large share of your nitrifying bacteria and this is not the moment to disturb it. Peer-reviewed aquaculture literature going back decades, including Hargreaves' 1998 review of nitrogen dynamics in closed systems, is unambiguous on one point: dilution is the only tool that acts on ammonia instantly, and everything else in the nitrogen cycle needs hours to days.
One honest caveat: ammonia binders and detoxifier products, the ones that claim to lock ammonia into a non-toxic form, do have a place as a bridge when you cannot do a change right away. But they interfere with some test kits and they do not remove nitrogen from the tank, so we treat them as a temporary measure, never as the plan. The plan is dilution, plus fixing the cause.
Step 4: Check KH Before Your Biofilter Stalls
This is the step most owners skip, and it is the one that separates a one-day scare from a two-week slump. Nitrification consumes carbonate hardness (KH) as a byproduct of processing ammonia; the rough stoichiometry is about 7 milligrams of alkalinity consumed per milligram of ammonia oxidized. In soft-water tanks, repeated ammonia spikes can drive KH so low that pH crashes below 6.0, and below roughly that point nitrifying bacteria effectively stop working. Your biofilter goes quiet while ammonia keeps arriving.
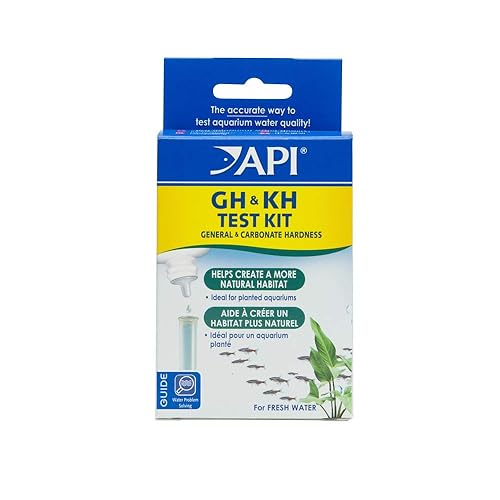 Run a KH test alongside your ammonia test. If carbonate hardness is bottoming out, a partial water change fixes two problems at once, because replacement tap water usually carries fresh carbonate. For tanks that chronically run low KH, crushed coral in the filter or a measured dose of alkalinity buffer stabilizes the floor. We keep a dedicated GH and KH test kit on the shelf for exactly this scenario, since liquid master kits do not cover alkalinity; the API GH and KH Freshwater Test Kit is the one we reach for, and it reads enough tests to last a hobbyist a full year.
If your pH has already crashed, do not chase it upward with chemicals. Water changes raise pH gradually and carryKH in the door; a powder that swings pH a full point overnight stresses fish more than the original problem.
Step 5: Add Oxygen and Backup Filtration Capacity
Nitrifying bacteria are obligate aerobes, and their activity drops sharply as dissolved oxygen falls. During a spike, two moves help: drop the water level slightly so the filter outflow hits the surface harder, or angle a powerhead to break the surface film. More surface disturbance means more gas exchange, and it costs nothing.
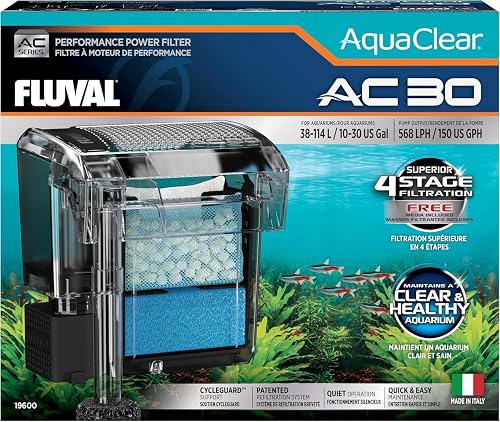 If the spike followed a filter failure or a media change, extra biological capacity helps the tank catch up. A spare hang-on-back filter seeded with media from an established tank can meaningfully shorten recovery; on a 20 to 30 gallon tank, the AquaClear 30 Power Filter is a common choice because its open media baskets take a handful of mature biomedia from the main filter without interrupting it. The rule that matters: borrow bacteria, never move all of it. Your main filter stays running and keeps most of its colony.
What does not help: adding new filter brands mid-crisis, dumping bottled bacteria as a substitute for water changes, or swapping cartridges. Bottled bacteria can be a useful supplement in a fishless or lightly stocked tank, but during a live spike it works alongside dilution, not instead of it.
Step 6: Protect the Bacteria You Already Have
The biofilter is your long-term fix, and spikes are frequently self-inflicted through filter maintenance. Three rules hold during recovery and after. First, never rinse biomedia in untreated tap water; chlorine kills nitrifying bacteria on contact, so swish media in the bucket of removed tank water instead. Second, do not clean the filter and do a large water change on the same day during a crisis; you are removing bacteria and bacteria food simultaneously. Third, replace only the mechanical layer, like a clogged sponge or floss pad, and keep the biological layer untouched for years. A media pad that looks dirty is doing its job.
During the 48-hour window, retest ammonia every 6 to 8 hours and log the trend. Falling numbers confirm the plan. A number that rebounds right after each water change means a source is still active, which moves you to the next step ahead of schedule.
Step 7: Find the Root Cause Before You Declare Victory
Ammonia does not appear in a mature tank without a reason. The usual suspects, roughly in order of how often we see them:
- A dead fish hidden behind driftwood or sucked into the filter intake. One neon tetra decomposing for three days will show green on every test.
- Overfeeding that crept up over weeks, especially with sinking wafers that dissolve unseen under decor.
- A filter that was switched off, accidentally unplugged, or whose flow silently dropped to a trickle from a clogged impeller.
- A cartridge or biomedia replaced in the same week, resetting part of the biofilter.
- Medication. Several common antibiotics damage nitrifying bacteria; treat the disease, but expect a mini-cycle afterward.
- Tap water carrying ammonia from chloramine treatment, confirmed by the tap tube from Step 1.
- A big cleanup: bleaching decor, deep-vacuuming gravel, or washing media, followed by a rebound.
Fixing the symptom without naming the source guarantees a repeat in two weeks. Count fish, check the filter plug and flow, and look under every piece of decor before you consider the case closed.
When Fish Are Showing Symptoms, Move Faster
Gill damage shows up as rapid breathing at rest, gasping at the surface, red or inflamed gill filaments, clamped fins, and sudden lethargy. If symptoms appear, the sized-change table above stops applying: do a 50 percent change immediately regardless of the exact number, add maximum surface agitation, and retest after the change. According to the AVMA, behavioral changes such as abnormal swimming or breathing are often the earliest visible sign of water quality problems in aquarium fish, which makes your eyes a faster detector than any test kit.
Ammonia testing also answers a question owners argue about online: yes, ammonia burn is survivable, and fish recover fully once the water is clean, provided the exposure was not prolonged. Clean water is the treatment. There is no medication for ammonia burn; there is only prevention of further exposure.
Ammonia Spike Mistakes We See Repeated
- Doing a tiny 10 percent change every day for a week. Dilution math does not work that way; halving the concentration needs a 50 percent change.
- Emptying and rinsing the filter because it looks dirty during a spike, which removes the bacteria that would have fixed the problem.
- Adding a full bottle of bacteria and skipping the water change, then testing two days later and panicking.
- Feeding normally because the fish look hungry. They always look hungry; ammonia does not care.
- Replacing an evaporated top-off with untreated water and calling it a water change. Top-offs add no dilution for dissolved waste.
- Chasing pH with up buffers while KH sits at zero, which stacks a second crisis on the first.
The 48-Hour Recovery Schedule
Hour zero: confirm the reading, test the tap, stop feeding. Hour one: sized water change, raise surface agitation, check filter flow. Hours six to eight: retest, repeat a change if the number has not fallen. Hour 24: retest; if near zero, resume feeding at half the normal amount for two days. Hour 48: full test panel, ammonia plus nitrite plus nitrate plus KH, to confirm the biofilter is processing normally. Return to your regular weekly test cadence only after three consecutive days of 0 ppm ammonia and 0 ppm nitrite.
For the first 24 hours after a confirmed spike, the API Freshwater Master Test Kit earns its spot on the shelf, because you will run more tests in two days than most owners run in a month; a single kit covers 800 tests, which is roughly two years of daily use.
The 10-Minute Spike Response Checklist
- Reconfirm ammonia with a timed, properly shaken test, and test the tap water.
- Stop feeding for 24 to 48 hours.
- Run a sized water change: 25 percent at 0.25 ppm, 50 percent at higher readings, temperature-matched and fully dechlorinated.
- Verify filter flow, plug, and impeller; do not clean the biofilter.
- Test KH; if it is near zero, restore it with water changes, not pH chemicals.
- Maximize surface agitation for oxygen.
- Look for a dead fish and check under every decoration.
- Retest every 6 to 8 hours and write the numbers down.
- Resume feeding at half rations once ammonia reads 0 ppm for a day.
- Book a full panel retest on day three before declaring the tank recovered.
A green ammonia tube is frightening precisely because it looks like the cycle failed after months of work. It usually has not. Bacteria colonies rebound fast once the source is gone, and a disciplined 48 hours of dilution, oxygen, and diagnosis gets most tanks back to yellow within a day or two. The tank that never spikes again is the one whose owner found the cause this week, not the one that got lucky.
Related Reading
Want more on this topic? Check out our guides on best aquarium auto top off ato systems hands, the best aquarium filters for beginners and planted tanks in, best aquarium water conditioners.