How to Trim a Hamster's Nails (Yes, Really) Without Getting Bitten
Many owners still remember the first time someone told them they needed to trim their hamster's nails. My reaction was something like, 'You want me to do what to a creature that fits in a teacup and has the temperament of a tiny, sleep-deprived badger?' But after watching my Syrian hamster, Peanut, get his claws caught in his cage bars one too many times, I realized it was time to learn. And honestly? It's not as terrifying as it sounds. In fact, with the right approach, it's a quick, low-stress procedure that most owners can do at home.
But here's the thing: most hamster owners never trim their hamster's nails, and many vets will tell you it's often unnecessary if your hamster has plenty of rough surfaces to walk on. That's true—up to a point. However, some hamsters, especially older ones or those with certain health conditions, grow nails that curl inward and can cause serious problems. Hamsters can develop nails so overgrown they walk on their knuckles, which is painful and can lead to infections.
So if you're wondering whether you should trim your hamster's nails, how to do it safely, and what tools you actually need, you're in the right place. I'll walk you through the entire process, from assessing whether a trim is necessary to handling a wriggly hamster and avoiding the dreaded quick. Let's get started.
Do Hamster Nails Actually Need Trimming?
Short answer: sometimes. Long answer: it depends on your hamster's lifestyle, age, and genetics. In the wild, hamsters walk on a variety of rough surfaces—dirt, rocks, tough vegetation—which naturally wears down their nails. In captivity, we often give them soft bedding, smooth plastic wheels, and flat cage floors. That lack of abrasion means their nails can grow long and sharp.
That said, many hamsters never need a trim. If your hamster has a solid exercise wheel with a textured running surface, a few rough ceramic hides, and maybe some safe wood chews to walk over, their nails might stay at a reasonable length. But some hamsters are just prone to long nails. Dwarf hamsters, for example, often have faster nail growth than Syrians. Older hamsters may also develop thicker, more brittle nails that don't wear down as easily.
So how do you know if a trim is needed? Look for these signs:
- Nails are visibly curling under the paw or growing sideways.
- You can hear a clicking sound when your hamster walks on a hard surface.
- Nails are getting caught in bedding, cage bars, or fabric.
- Your hamster is limping or favoring a paw.
- You can see the nail extending well beyond the toe pad.
If you notice any of these, it's time to consider a trim. But before you grab the clippers, let's talk about the risks—because there are some, and they're worth understanding.
The Risks of Trimming (and Why You Shouldn't Just Wing It)
The biggest risk is cutting the quick—the blood supply and nerve inside the nail. If you cut into it, it bleeds. A lot. And it hurts. Hamsters can scream (yes, hamsters can scream) and then refuse to be handled for weeks. That's a trust-breaking experience you want to avoid.
Another risk is stressing your hamster to the point of health problems. Hamsters are prey animals. They're wired to interpret handling as a potential threat. If you're rough, impatient, or nervous, they'll pick up on it. Stress can lead to wet tail, a potentially fatal bacterial infection, especially in young or immunocompromised hamsters.
And then there's the bite risk. A scared hamster will bite. It's not personal. It's self-defense. Hamster bites are a common occurrence during nail trims, and while it's not the worst pain in the world, it's not fun. The key is to minimize stress for both of you.
So should you just skip the trim and let a vet do it? That's always an option. In fact, if you're unsure or your hamster is particularly squirmy, a vet visit is the safest bet. But many vets will charge $50 or more for a nail trim, and if your hamster needs regular trims, that adds up. Learning to do it yourself is a valuable skill.
Tools You Actually Need (and What to Skip)
You don't need much. In fact, you probably have most of these items already:
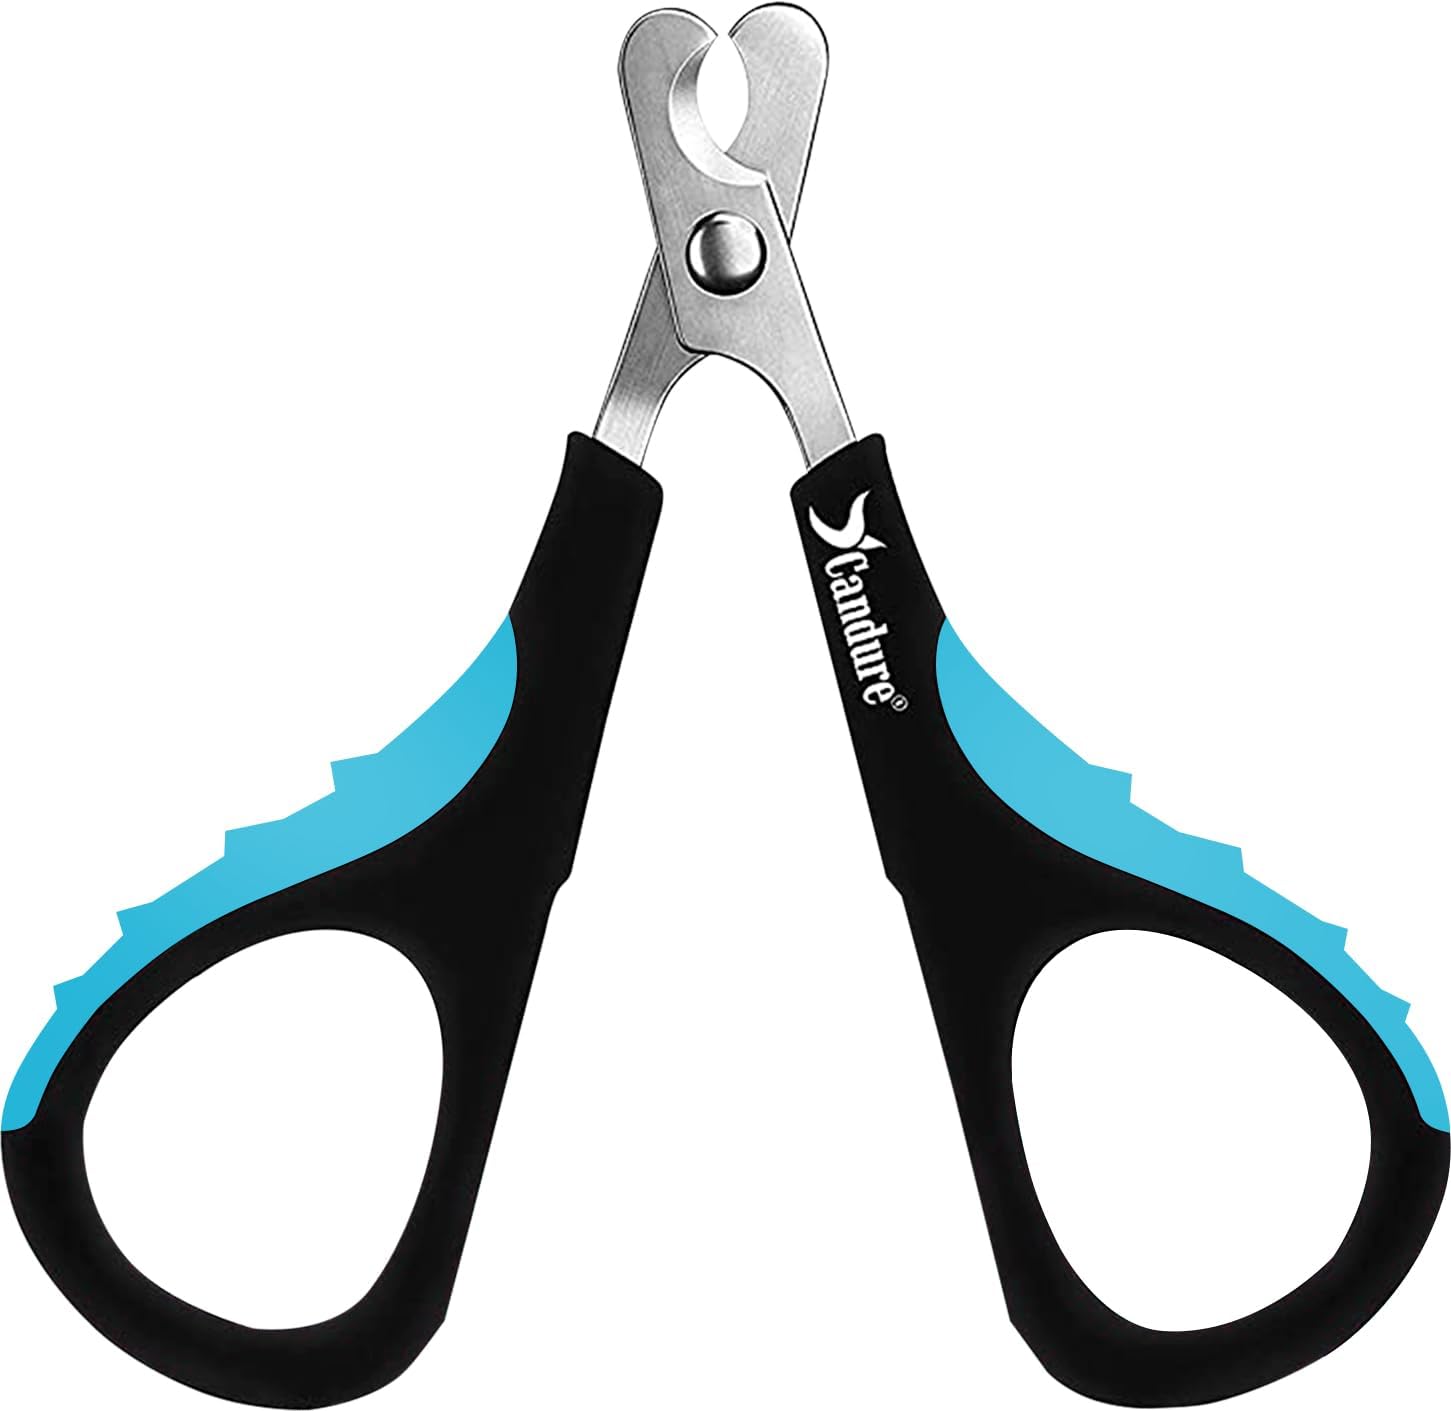
- Small animal nail clippers: These look like tiny scissors with a curved blade. You can find them at pet stores or online. Avoid human nail clippers—they're too big and can crush the nail.
- Styptic powder or cornstarch: This stops bleeding if you accidentally cut the quick. Styptic powder is faster, but cornstarch works in a pinch.
- A towel: For wrapping your hamster if they're wriggly.
- Good lighting: You need to see the quick. A desk lamp or bright overhead light helps.
- Treats: For positive reinforcement before, during, and after.
What to skip: human nail clippers, scissors (they can crush the nail), and anything that requires two hands to operate. You'll need one hand to hold your hamster.
If you're looking for a reliable pair of small animal clippers, the Millers Forge Nail Clipper is a solid option. It's sharp, precise, and has a safety stop to prevent over-cutting.
Step-by-Step: How to Trim Your Hamster's Nails Safely
Okay, deep breath. Here's the process, broken down into manageable steps. Remember: patience is everything. If your hamster is stressed, stop and try again later. Never force it.
Step 1: Get Your Hamster Comfortable with Handling
If your hamster isn't already used to being held, you need to work on that first. Spend a few days just hand-taming. Let them crawl into your palm, offer treats, and keep sessions short (5 minutes max). A hamster that trusts you is a hamster that won't freak out during a nail trim.
I like to do a 'practice run' where I just hold each paw gently for a second and then release. This gets them used to the sensation without the clippers.
Step 2: Set Up Your Workspace
Find a quiet, well-lit area. A bathroom counter works well because it's easy to clean and has good lighting. Put a towel down so your hamster doesn't slip. Have your clippers, styptic powder, and treats within arm's reach. The last thing you want is to be fumbling around while holding a squirming hamster.
Step 3: Hold Your Hamster Securely
There are two main holds for nail trimming:
- The belly-up hold: Cup your hamster in one hand, belly up, with their head slightly elevated. This gives you easy access to all four paws. Some hamsters hate this position, so be prepared to switch.
- The towel wrap: If your hamster is a biter or super wriggly, wrap them loosely in a towel, leaving one paw out at a time. This is my go-to for feisty dwarfs.
Never scruff a hamster like you would a cat or dog. That's dangerous and can cause injury.
Step 4: Identify the Quick
The quick is the pink area inside the nail. In light-colored nails, it's easy to see. In dark nails, it's nearly impossible. For dark nails, you'll need to trim in tiny increments—like 1 millimeter at a time—and stop as soon as you see a grayish or pinkish dot in the center of the cut surface. That's the start of the quick.
If you're not sure, just take off the very tip. It's better to under-trim than to cut the quick.
Step 5: Clip One Nail at a Time
Position the clippers so the cutting edge is perpendicular to the nail. Make a quick, clean cut. Don't squeeze slowly—that crushes the nail. Aim to take off just the curved tip. If the nail is very long, you might need to do multiple small cuts over several sessions rather than one big chop. This is especially true for curled nails.
After each nail, give your hamster a tiny treat. This creates a positive association. A piece of sunflower seed or a small piece of carrot works well.
If you accidentally cut the quick, apply styptic powder or cornstarch with light pressure. It stops bleeding within a minute or two. Don't panic—it happens to the best of us.
Step 6: Take Breaks
If your hamster is squirming, put them back in their cage for a few minutes. Let them calm down. Then try again. You don't have to do all four paws in one sitting. In fact, I often do just one or two nails per day for a week when I'm dealing with a particularly difficult hamster. It's less stressful for everyone.

How Often Should You Trim Hamster Nails?
For most hamsters, every 4-8 weeks is plenty. But it really depends on how fast their nails grow and how much wear they get. Nails are worth checking every two weeks during regular handling sessions. If they are getting long, schedule a trim.
Some hamsters might need a trim every 3 weeks. Others might go 3 months. There's no one-size-fits-all schedule. The key is to check regularly and act before the nails become a problem.
What If Your Hamster Won't Cooperate?
Some hamsters just hate having their feet touched. Certain individuals would rather launch themselves off a hand than sit still for a nail trim. If that's your hamster, here are a few strategies:
- Try a different hold. Some hamsters prefer being held vertically instead of belly-up.
- Use a towel. Wrapping them snugly can calm them down.
- Do it in a bathtub. A dry, empty bathtub gives you a contained space where your hamster can't escape. You can let them run around and trim one nail each time they pause.
- Get help. Have a friend hold your hamster while you trim.
- Visit the vet. If all else fails, a vet can do it quickly and safely. Some vets will even show you how to do it yourself.
And remember: if your hamster is genuinely terrified, it's not worth the stress. Overgrown nails are a problem, but a stressed-out hamster with wet tail is a bigger one. Talk to your vet about options.
Preventing Overgrown Nails in the First Place
The best way to avoid nail trims is to give your hamster plenty of opportunities to wear them down naturally. Here's the process:
- Provide a textured exercise wheel. Look for wheels with a solid running surface that has a slight texture. Avoid wire wheels—they cause bumblefoot.
- Add rough surfaces. Ceramic hides, slate tiles, and safe wood chews all provide abrasion.
- Scatter feed. Instead of using a bowl, scatter your hamster's food around the cage. This encourages foraging and movement over different surfaces.
- Use a dig box. A box filled with coconut coir or shredded paper gives your hamster a chance to dig, which wears down nails.
I also recommend a hamster exercise wheel with a textured surface. It's a simple upgrade that makes a big difference.
When to See a Vet Instead
There are times when DIY nail trimming isn't the right call. If your hamster has:
- Nails that are severely curled or ingrown
- Bleeding or signs of infection around the nail bed
- Swelling or redness in the toes
- Difficulty walking or signs of pain
- A health condition like diabetes or wet tail
...then see a vet. They can trim the nails safely and address any underlying issues. According to the ASPCA, regular veterinary check-ups are essential for small pets, and nail health is part of that. A vet can also show you the proper technique if you're unsure.
I also want to mention that some hamsters have genetic conditions that cause brittle or malformed nails. In those cases, a vet may recommend more frequent trims or even medication.
Common Mistakes and How to Avoid Them
Hamster owners make just about every mistake you can make. The quick can get cut—especially on dark-nailed hamsters, where it is nearly impossible to see. Hamsters can bite hard enough to draw blood. Some hamsters scream every time they are picked up. But there are approaches that work.
The biggest lesson? Go slow. There's no rush. If you only get one nail trimmed today, that's a win. Your hamster's health and trust are more important than getting all four paws done in one sitting.
Another lesson: don't use human nail clippers. Human clippers are shaped for flat nails and can split a hamster's nail down the middle, which can mean a painful vet visit.
And finally: always have styptic powder on hand. You might not need it, but when you do, you'll be glad it's there.
Final Thoughts (and a Quick Recap)
Trimming a hamster's nails isn't the most glamorous part of pet ownership, but it's a skill worth learning. With the right tools, a calm approach, and a lot of patience, you can keep your hamster's nails healthy and avoid painful overgrowth. Remember:
- Check nails every two weeks.
- Trim only the tips unless you can see the quick clearly.
- Use small animal clippers, not human ones.
- Have styptic powder ready.
- Take breaks and use treats liberally.
- See a vet if you're unsure or if there are signs of infection.
If you're still nervous, consider booking a vet appointment and asking them to walk you through it. Most vets are happy to teach. And if you decide to do it yourself, start with just one nail. Build up from there. Your hamster will thank you—probably by stuffing their cheeks with treats and giving you that look that says, 'Why are you so obsessed with my feet?'
For more information on hamster care, check out the ASPCA's hamster care guide or talk to your exotics vet. And if you need a good pair of clippers, the Millers Forge clippers are a solid choice. Happy trimming!
Related Reading
Want more on this topic? Check out our guides on best small pet hay feeders hay racks, what can guinea pigs eat, best rat cages social spaces for your pet rats.